Data Editing#
Standard Data Editing Settings#
This section describes how to configure common output rules such as prefixes, suffixes, and hidden characters by scanning Parameter Barcodes.
Prefix/Suffix and Hidden Character Settings#
You can add up to 10 prefixes and/or 10 suffixes to the output data. To configure them, scan the two-digit hexadecimal Numeric Barcodes that correspond to the required ASCII value (that is, two barcodes per character).
See also
For character values, please refer to ASCII Function Key Character Reference Table and ASCII Character Reference Table; for parameters that require input of numerical values, please scan Numeric Barcode; for specific procedures, see Add a Prefix or Suffix.
Can be set to hide the first, middle or last characters of the barcode. After scanning the corresponding hidden Parameter Barcode, scan the two-digit hexadecimal Numeric Barcode corresponding to the length of the characters to be hidden (00~FF, for example, scan 0 and 4 in sequence when hiding 4 characters).
See also
See Steps to Hide the First/Middle/Tail Characters of a Barcode for the hidden character process.
Operation Code#
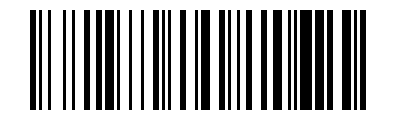
Add Prefix#
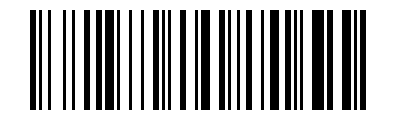
Add Suffix#
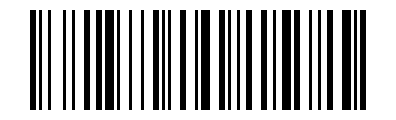
Clear all prefixes#
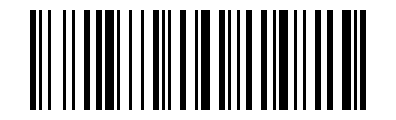
Clear all suffixes#
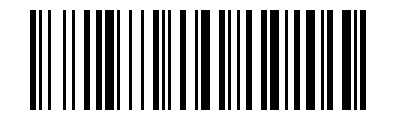
Hide Leading Characters#
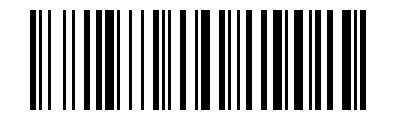
Hide Barcode Middle Start Position#
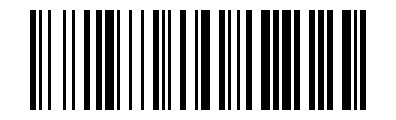
Hide Middle Section Length#
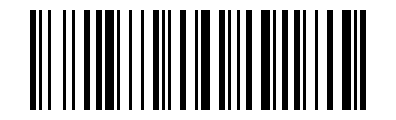
Hide Trailing Characters#
Numeric Barcode#
For parameters that require a numeric value, scan the corresponding Numeric Barcodes.

Numeric Barcode 0#

Numeric Barcode 1#

Numeric Barcode 2#

Numeric Barcode 3#

Numeric Barcode 4#

Numeric Barcode 5#

Numeric Barcode 6#

Numeric Barcode 7#

Numeric Barcode 8#

Numeric Barcode 9#

Numeric Barcode A#

Numeric Barcode B#

Numeric Barcode C#

Numeric Barcode D#

Numeric Barcode E#

Numeric Barcode F#
Output Format Settings#
To change the output data format, scan the corresponding Parameter Barcode below.
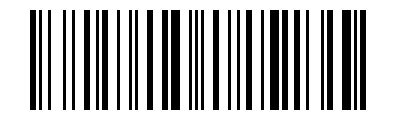
Default Output Format#
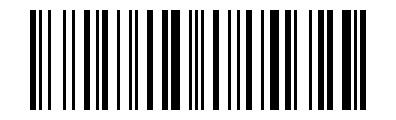
Allow Suffix Output#
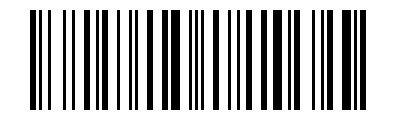
Allow Prefix Output#
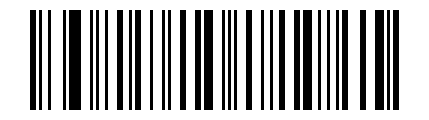
Allow Hiding Leading Data#

Allow Hiding Middle Data#

Allow Hiding Trailing Data#
Procedure Examples#
Add a Prefix or Suffix#
If prefix and suffix output has not been enabled, please scan the corresponding Output Format Parameter Barcode first.
New characters are appended to the existing Prefix/Suffix. To replace the current Prefix/Suffix, first scan “Clear All Prefixes/Suffixes”, then configure the new values.
Scan the “Add Prefix” or “Add Suffix” Parameter Barcode.
Determines the hexadecimal value of the prefix or suffix to be entered based on ASCII Function Key Character Reference Table or ASCII Character Reference Table.
Scan the corresponding two-digit hexadecimal Numeric Barcode.
To continue adding characters, repeat steps 4 and 5.
Example
If you need to add Ctrl+A as a prefix, scan “Add Prefix” “9” “7” “4” “1” in sequence.
Example
If you need to add Ctrl+Alt+A as a suffix, scan “Add suffix” “9” “7” “9” “9” “4” “1” in sequence.
Steps to Hide the First/Middle/Tail Characters of a Barcode#
Scan the Parameter Barcode for the barcode header, middle start position, middle length, or trailing characters.
Determine the hexadecimal value corresponding to the character length to be hidden (for example, hide 4 characters scan
0,4; hide 12 characters scan0,C).Scan the corresponding two-digit hexadecimal Numeric Barcode.
Enable or disable the hidden character function through the Output Format Parameter Barcode.
Extended Data Editing Settings#
This section lets you generate data editing Parameter Barcodes from complete commands in one step. It is intended for batch configuration, remote serial-command delivery, or character replacement.
Online One-Code Setup Generator#
Note
The online generator is shown only in the HTML manual. After generating a Parameter Barcode, scan the generated barcode to complete the setting, or send the command by serial command using the format below.
Add Prefix#
Static command instructions
If the interactive HTML tool is unavailable, replace the placeholders as described in this section and verify the command.
$DATA#20<length-hex><content>#
Add Suffix#
Static command instructions
If the interactive HTML tool is unavailable, replace the placeholders as described in this section and verify the command.
$DATA#10<length-hex><content>#
Hide Leading Barcode Characters#
Static command instructions
If the interactive HTML tool is unavailable, replace the placeholders as described in this section and verify the command.
$DATA#50<length-hex>#
Hide Middle Barcode Characters#
Static command instructions
If the interactive HTML tool is unavailable, replace the placeholders as described in this section and verify the command.
$DATA#40<position-hex><length-hex>#
Hide Trailing Barcode Characters#
Static command instructions
If the interactive HTML tool is unavailable, replace the placeholders as described in this section and verify the command.
$DATA#30<length-hex>#
Character Replacement#
Static command instructions
If the interactive HTML tool is unavailable, replace the placeholders as described in this section and verify the command.
$DATA#70<source-length-hex><source><target-length-hex><target>#
One-Code Setup Command Format#
Edit format:
$DATA#ncllxx#
n1suffix;2prefix;3hides the tail content of the barcode;4hides the middle content of the barcode;5hides the first content of the barcode;7replaces characters.cCode ID currently supports only
0, which indicates all symbologies.llLength as a hexadecimal value: Prefix/Suffix
01~0A, hidden characters01~FF, replacement data01~05.xxASCII value. Hexadecimal can be represented by
\xplus two characters, and the character range is0~9,A~F.
Command |
Description |
|---|---|
|
Add |
|
Add |
|
Hide the last |
|
Hides the |
|
Hide barcode header |
|
Replace GS ( |
|
Replace |
Character replacement operation#
Format: $DATA#70 + replaced character length + replaced characters + replacement data length + replacement data #
The sum of the lengths of the replaced characters and the replacement characters is <= 6, supporting 1~6 characters being replaced by 5~0 characters.

Read replacement settings#
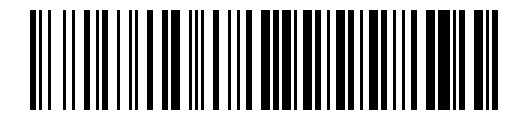
Clear replacement settings#
Example
$DATA#7001\x1D02GS# means replacing the non-displayable character GS (0x1D) with GS for display.

Character replacement operation: GS to text GS#
Example
$DATA#7001\x0A01\x0D# means replacing LF (0x0A) with CR (0x0D).

Character replacement operation: LF to CR#
Example
$DATA#7006ABCDEF00# means replacing the string ABCDEF with an empty string, that is, not displaying it.
Terminator Settings#
Note
This terminator is independent of the scan engine suffix and wireless Prefix/Suffix, which facilitates quick setting when the scan engine has no suffix.

None (Default)#

Carriage Return CR#

Tab TAB#

Carriage Return + Line Feed CRLF#

Line Feed LF#
GS1 AI field bracket settings#
Note
Only some AI fields are applicable and require special version support.

Raw Format (Default)#

Add Parentheses#

Add brackets and separate with CR#

Add brackets and separate them with TAB#